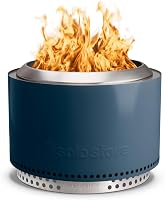
How to Light and Use a Solo Stove
Here's how to use a Solo Stove: choose a suitable outdoor spot, light dry kindling, and add split firewood gradually. Keep vents clear, follow your model's manual, and supervise the fire through shutdown before cleaning completely cold ash.
On this page (9 sections)
- How do you use a Solo Stove step by step?
- What should you check before lighting a Solo Stove?
- What wood should you burn in a Solo Stove?
- How do you keep the fire burning with less smoke?
- How do you add wood without smothering the flame?
- Which Solo Stove size should you choose?
- How do you put out and clean a Solo Stove?
- Which mistakes should you avoid with a Solo Stove?
- How to use a Solo Stove and choose the right fit
Here's how to use a Solo Stove: light dry kindling, add split firewood gradually, and keep the air openings clear. Choose a suitable outdoor location first, then supervise the fire through shutdown and let everything cool before cleanup.
Good results depend on fuel and airflow, not a tightly packed stack of logs. Choose a size you can move, store, and feed comfortably so each fire stays manageable.
How do you use a Solo Stove step by step?
Start with a small, loosely arranged fire, then build it up as the wood catches. Check your model's manual for part placement, clearances, and fuel limits before lighting.
- Check local fire restrictions and weather conditions.
- Place the stand and pit on a stable, suitable outdoor surface.
- Seat the ash pan and base plate correctly, clear the vents, and position the fire ring as directed.
- Arrange dry kindling around a suitable fire starter, leaving gaps for air.
- Light the starter and let the kindling catch.
- Add small pieces of split firewood, followed by larger pieces once the fire is steady.
- Stop adding fuel well before you need to leave, then supervise the burn-down and cooling period.
Keep gasoline, alcohol, and other liquid accelerants away from the fire. Don't move the pit once it's lit or while hot ash remains.
For food, use only cooking equipment approved for your model. Our guide to cooking on a smokeless fire pit explains what to check before planning a meal.
What should you check before lighting a Solo Stove?
Check the surface, clearances, wind, and local rules before adding fuel. A low-smoke fire still produces heat, sparks, and embers.
Use an open outdoor location that meets the manual's clearances from walls, fences, furniture, and overhead branches. Clear away dry leaves and other loose material, and keep children and pets outside the fire area.
All 3 models here include a stand, but that stand doesn't make every surface suitable. Check the deck or flooring manufacturer's guidance and use additional heat protection where required.
Leave room for chairs and a clear walking route without crowding the pit. Have suitable fire-extinguishing equipment nearby, and postpone the fire if wind could carry embers toward anything combustible.
Before choosing a model, compare Solo Stove sizes, including Ranger, Bonfire, and Yukon. For placement and handling, see fire pit safety basics.
What wood should you burn in a Solo Stove?
Use dry, split firewood that fits inside the pit's fuel limits. Avoid wet wood, treated or painted lumber, and trash.
Gather kindling, small splits, and larger pieces before you begin. Trying to light only thick logs makes it harder to establish the steady flame needed to build heat.
Keep logs below your model's maximum fill level and fully inside the burn chamber. Don't balance a long piece across the rim or block the upper air openings with fuel.
Solo Stove recommends oak, maple, birch, or hickory for the Basecamp 24. That model is for firewood logs only, not pellets or the Pellet Adapter.
Store your fuel off damp ground with protection from rain and enough airflow to stay dry. Our guide to wood for a smokeless fire pit explains fuel selection in more detail.
How do you keep the fire burning with less smoke?
Keep dry fuel burning steadily with room for air to move. Some smoke during startup or after adding wood doesn't mean the pit has failed.
Solo Stove's double-wall design draws air through lower vents, warms it between the walls, and releases it above the fire. This secondary burn helps consume particles that would otherwise become smoke.
Give the initial fire time to build heat before adding thick logs. Dumping in several pieces at once can cool and crowd the fire, especially if the wood is damp.
If smoke persists, check the fuel, fill level, and air openings before adding more wood. Our guide to why a Solo Stove may be smoking helps narrow down the cause.
For more detail on the secondary burn, read how a smokeless fire pit works.
How do you add wood without smothering the flame?
Add a small amount of wood to an established flame, then wait for it to catch. Keep gaps between pieces instead of making a dense pile.
Place new fuel carefully rather than dropping it onto burning logs. Use a suitable fire tool when repositioning wood, keeping hands, sleeves, and your face away from the hot rim.
If the flame weakens after a refill, don't immediately add another load. Give the existing pieces time to catch and check whether they need more space for air.
Match the fire to the time you have left outside. A fresh load near bedtime creates more embers to supervise and delays safe cleanup.
Which Solo Stove size should you choose?
Choose Ranger for frequent carrying, Bonfire for mixed home and travel use, or Basecamp for regular backyard gatherings. Start with your usual group and storage space rather than your largest possible party.
The same lighting habits apply across these wood-burning pits. The buying difference is how much space, lifting, and fuel preparation you want each fire to involve.
How does size change how you use a Solo Stove?
A smaller model makes transport easier but requires wood that fits its smaller chamber. A larger model needs more room for the pit, seating, and safe movement around it.
Solo Stove Bonfire with Stand: This middle option weighs 21.7 lb, measures 19.49 in across, and suits groups of 4–6 according to Solo Stove. Choose it for backyard evenings plus occasional trips; skip it if carrying weight is your main concern.
Solo Stove Ranger 2.0: Solo Stove recommends Ranger for 2–4 people, and its included nylon case helps with packing and transport. Choose it for a small group that travels often; skip it if you regularly host a larger circle.
Solo Stove Basecamp 24: At 30.5 lb, this is the heaviest option here and better suited to a regular backyard spot. Skip it if storage is tight, frequent carrying is central to your plans, or you want to burn pellets.
Read the Solo Stove Bonfire review for more on the middle option. If you're still choosing a fuel type, our fire pit selection guide compares the broader choices.
How do you put out and clean a Solo Stove?
For routine shutdown, stop adding fuel and supervise the fire as it burns down, following your manual. Leave enough time for cooling before carrying, covering, or cleaning the pit.
Don't leave while flames or glowing embers remain. If you need to extinguish the fire sooner, follow your model's directions; in an emergency, protect people first and use appropriate emergency help.
All 3 models have a removable ash pan and base plate. Once everything is completely cold, remove those parts as directed and transfer ash to a metal container with a lid.
Keep that container away from combustible materials, and don't put warm ash in household trash. Clear loose debris from the air openings before putting the parts back.
Store the pit dry and use only care methods suitable for its finish. Choose a fire pit cover that fits, and fit it only after the pit has cooled completely.
Which mistakes should you avoid with a Solo Stove?
Avoid overfilling, damp fuel, blocked vents, and rushed shutdowns. These habits cause more trouble than small differences in how you arrange the first pieces of kindling.
Don't treat “smokeless” as permission to burn anything or use the pit in an enclosed area. Use it outdoors with the required open space and suitable firewood.
Don't assume a stand stops sparks or makes hot metal safe to touch. Keep the same separation from people and combustible items throughout the fire and cooling period.
Don't choose wood heat if your routine leaves no time for supervised burn-down. Compare smokeless wood versus propane fire pits if quick starts and stops matter more than tending logs.
How to use a Solo Stove and choose the right fit
Choose Bonfire for a balance of backyard use and occasional transport, Ranger for smaller traveling groups, or Basecamp for a regular gathering spot with more room. Skip any model that you can't comfortably carry or store.
Knowing how to use a Solo Stove also means planning the whole evening, including fuel preparation and shutdown. Set aside dry wood, check your location, and leave time to supervise the last embers.
Before your first fire in a new spot, review fire pit safety basics alongside your model's manual.
Frequently asked questions
How do you light a Solo Stove?
Light dry kindling around a suitable fire starter, then add small pieces of split firewood once the flame is steady. Leave space for air between pieces, follow your model's lighting directions, and avoid liquid accelerants.
Add larger pieces gradually instead of filling the pit at the start.
What wood should you use in a Solo Stove?
Use dry, split firewood that fits inside your model's fuel limits. Smaller pieces help establish the fire before you add larger logs.
Solo Stove recommends hardwoods such as oak, maple, birch, or hickory for the Basecamp 24, which takes firewood logs only, not pellets or a Pellet Adapter.
Can you use a Solo Stove on a deck?
Use a Solo Stove on a deck only when the fire pit manual, deck manufacturer's guidance, and local rules allow that setup. A stand helps protect heat-sensitive surfaces but doesn't contain sparks or make every deck suitable.
Follow all required clearances and use additional surface protection where directed.
How do you clean a Solo Stove after a fire?
Wait until the fire pit and ash are completely cold, then remove the base plate and ash pan as your manual directs. Transfer ash to a metal container with a lid and keep it away from combustible materials.
Clear loose debris from air openings before reassembling and storing the pit dry.